How does the empty lip balm tube set compare to other lip balm products on the market?

The empty lip balm tube set differs from other lip balm products on the market primarily in its purpose and usage.

Here are some key comparisons:

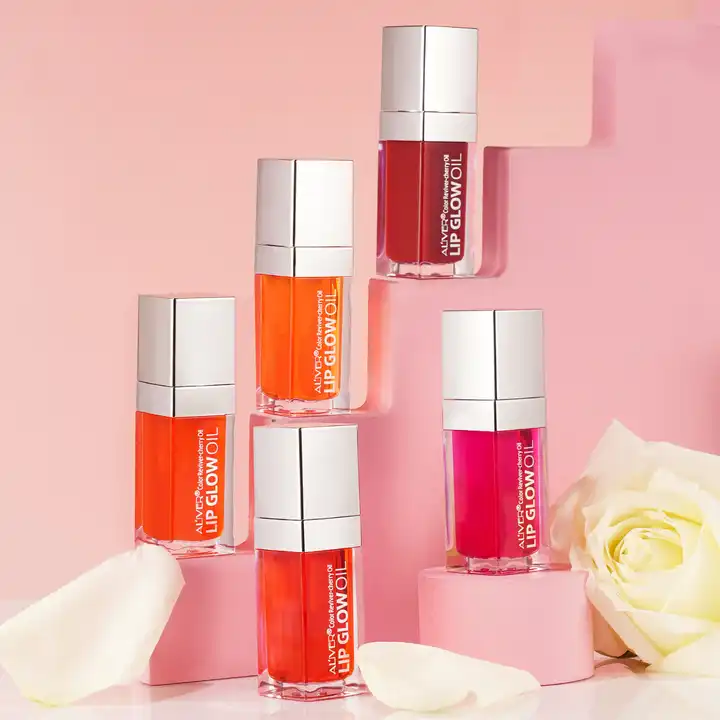
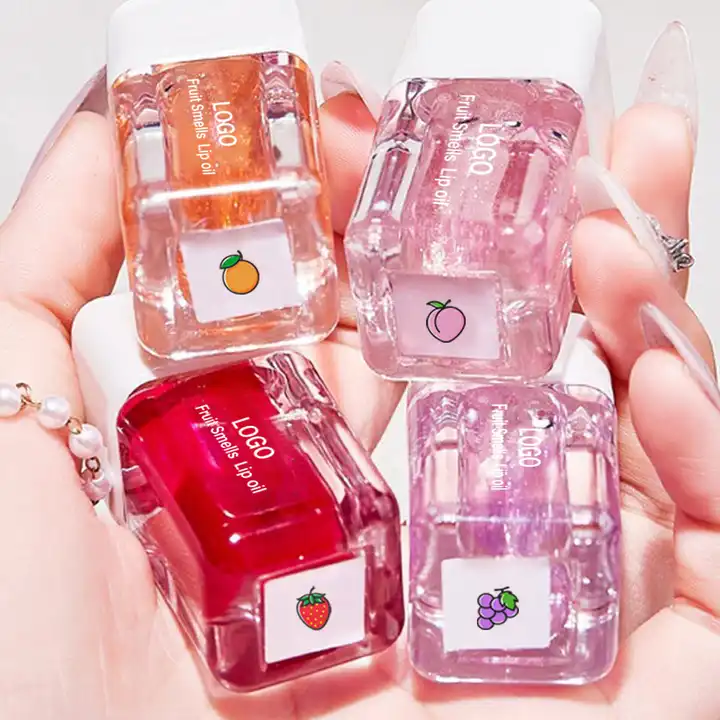
  1. Customization and Personalization: The empty lip balm tube set allows users to create their own custom lip balm formulations by filling the empty tubes with their preferred ingredients, such as oils, butters, waxes, and flavors. This level of customization is not typically available with pre-filled lip balm products on the market, which come in standard formulations and flavors.
  2. Flexibility in Ingredients: With the empty lip balm tube set, users have the flexibility to choose the specific ingredients they want to include in their lip balm formulations, allowing for greater control over factors such as texture, scent, flavor, and therapeutic properties. This level of control is not possible with pre-made lip balm products, which may contain a fixed set of ingredients chosen by the manufacturer.
  3. Cost-Effectiveness: The empty lip balm tube set may offer cost savings in the long run, as users can purchase bulk quantities of empty tubes and fill them with their own formulations, which may be more economical compared to purchasing individual pre-filled lip balm products. This can be particularly beneficial for individuals who use lip balm frequently or prefer to have multiple customized options available.
  4. Freshness and Quality: By filling the empty lip balm tubes with freshly made formulations, users can ensure the freshness and quality of their lip balm products. empty lip balm tube This is especially important for those who prioritize using natural or organic ingredients and want to avoid preservatives or additives commonly found in commercial lip balm products.
  5. DIY Experience: The empty lip balm tube set offers a DIY (do-it-yourself) experience, allowing users to engage in a fun and creative activity of making their own lip balm products. This can be enjoyable for individuals who appreciate crafting and personalizing their skincare routines.
  6. Educational Opportunity: Using the empty lip balm tube set provides an educational opportunity for users to learn more about the ingredients used in lip balm formulations, their properties, and their effects on the skin. This hands-on experience can deepen users’ understanding of skincare ingredients and empower them to make informed choices about their beauty products.

Overall, while the empty lip balm tube set may require more effort and involvement compared to pre-made lip balm products, it offers unique advantages in terms of customization, cost-effectiveness, freshness, and DIY experience. Users who value these benefits may prefer the empty lip balm tube set as a customizable and personalized option for their lip care needs.

How does the lip gloss lip balm set differ from traditional lip balms?

The lip gloss lip balm set differs from traditional lip balms primarily in its formulation, texture, and finish. Here are some key differences:

  1. Formulation: Lip gloss lip balms typically have a lighter, glossier texture compared to traditional lip balms. They often contain ingredients such as oils, waxes, and emollients to provide hydration and shine to the lips, similar to lip glosses.
  2. Shine and Finish: Lip gloss lip balms offer a shiny or glossy finish when applied to the lips, imparting a lustrous sheen. In contrast, traditional lip balms usually have a matte or satin finish that provides hydration without added shine.
  3. Color and Tint: Some lip gloss lip balm sets may contain tinted or colored formulations, offering subtle or sheer pigmentation to enhance the natural color of the lips. Traditional lip balms are typically colorless or translucent, providing hydration without adding color.
  4. Texture and Feel: Lip gloss lip balms often have a smoother, silkier texture that glides effortlessly onto the lips, imparting a lightweight and comfortable feel. Traditional lip balms may have a thicker or waxier texture that provides more substantial moisture and protection to the lips.
  5. Purpose and Use: Lip gloss lip balms are designed to provide both hydration and shine to the lips, making them suitable for everyday wear or as a finishing touch to makeup looks. They offer a balance between lip care and cosmetic enhancement. Traditional lip balms are primarily focused on moisturizing and protecting the lips from dryness, chapping, and environmental damage.
  6. Packaging and Presentation: Lip gloss lip balm sets often come in packaging that resembles traditional lip glosses, with sleek tubes or containers and applicators for easy and precise application. Traditional lip balms are typically packaged in stick or pot form, with simple and functional packaging designed for convenient use.

Overall, while both lip gloss lip balms and traditional lip balms serve the purpose of providing hydration and protection to the lips, lip gloss lip balms offer additional shine, color, and cosmetic benefits, making them a versatile option for those looking to enhance their lip care routine while adding a touch of glamour.

What advantages does low cement castable offer in terms of ease of maintenance and repair?


Fire-resistant boards exhibit resistance to chemical corrosion and degradation due to several key factors:

  1. Composition: Fire-resistant boards are typically made from inorganic materials such as cement, gypsum, or mineral wool. These materials are inherently resistant to chemical reactions and degradation, making them suitable for applications where exposure to corrosive substances is a concern.
  2. Non-Combustible Properties: Fire-resistant boards are designed to withstand high temperatures without burning or releasing harmful gases. Their non-combustible nature minimizes the risk of chemical reactions or degradation that may occur under extreme heat conditions.
  3. Surface Coatings: Some fire-resistant boards are coated with protective layers or additives that enhance their resistance to chemical corrosion. These coatings may include acrylic, silicone, or polymer-based materials that form a barrier against moisture, acids, alkalis, and other corrosive agents.
  4. Inertness: Fire-resistant boards are chemically inert, meaning they do not react with most chemicals or gases. This inertness prevents chemical corrosion and degradation, ensuring the structural integrity and longevity of the boards in corrosive environments.
  5. Physical Durability: Fire-resistant boards are durable and resistant to mechanical stress, impact, and abrasion. Their robust construction prevents physical damage that could compromise their chemical resistance and overall performance.
  6. Low Porosity: Fire-resistant boards have low porosity, meaning they have minimal pores or voids that could absorb moisture or chemical substances. This reduces the likelihood of chemical corrosion and degradation by limiting the penetration of corrosive agents into the board material.
  7. Testing and Certification: Fire-resistant boards undergo rigorous testing and certification to verify their chemical resistance properties. They are evaluated according to industry standards and regulations to ensure they meet specific performance criteria for resistance to chemical corrosion and degradation.
  8. Application-Specific Formulations: Manufacturers may develop specialized formulations of fire-resistant boards with enhanced chemical resistance properties for specific applications or environments. These formulations may incorporate additives or reinforcements that improve the boards’ ability to withstand exposure to corrosive substances.

Overall, fire-resistant boards are resistant to chemical corrosion and degradation due to their composition, non-combustible properties, surface coatings, inertness, physical durability, low porosity, testing and certification, and application-specific formulations. Their use provides reliable protection against chemical damage in a variety of industrial, commercial, and residential applications.

What makes fire resistant board resistant to chemical corrosion and degradation?

Fire-resistant boards exhibit resistance to chemical corrosion and degradation due to several key factors:

  1. Composition: Fire-resistant boards are typically made from inorganic materials such as cement, gypsum, or mineral wool. These materials are inherently resistant to chemical reactions and degradation, making them suitable for applications where exposure to corrosive substances is a concern.
  2. Non-Combustible Properties: Fire-resistant boards are designed to withstand high temperatures without burning or releasing harmful gases. Their non-combustible nature minimizes the risk of chemical reactions or degradation that may occur under extreme heat conditions.
  3. Surface Coatings: Some fire-resistant boards are coated with protective layers or additives that enhance their resistance to chemical corrosion. These coatings may include acrylic, silicone, or polymer-based materials that form a barrier against moisture, acids, alkalis, and other corrosive agents.
  4. Inertness: Fire-resistant boards are chemically inert, meaning they do not react with most chemicals or gases. This inertness prevents chemical corrosion and degradation, ensuring the structural integrity and longevity of the boards in corrosive environments.
  5. Physical Durability: Fire-resistant boards are durable and resistant to mechanical stress, impact, and abrasion. Their robust construction prevents physical damage that could compromise their chemical resistance and overall performance.
  6. Low Porosity: Fire-resistant boards have low porosity, meaning they have minimal pores or voids that could absorb moisture or chemical substances. fire resistant board This reduces the likelihood of chemical corrosion and degradation by limiting the penetration of corrosive agents into the board material.
  7. Testing and Certification: Fire-resistant boards undergo rigorous testing and certification to verify their chemical resistance properties. They are evaluated according to industry standards and regulations to ensure they meet specific performance criteria for resistance to chemical corrosion and degradation.
  8. Application-Specific Formulations: Manufacturers may develop specialized formulations of fire-resistant boards with enhanced chemical resistance properties for specific applications or environments. These formulations may incorporate additives or reinforcements that improve the boards’ ability to withstand exposure to corrosive substances.

Overall, fire-resistant boards are resistant to chemical corrosion and degradation due to their composition, non-combustible properties, surface coatings, inertness, physical durability, low porosity, testing and certification, and application-specific formulations. Their use provides reliable protection against chemical damage in a variety of industrial, commercial, and residential applications.

How does the machine handle cutting patterns with intricate notches or markings?

Handling cutting patterns with intricate notches or markings requires precision and attention to detail from the cutting machine.

Here’s how such a machine might handle this task:

  1. High-Resolution Cutting: The machine utilizes high-resolution cutting technology, such as laser or waterjet cutting, which allows for precise cutting of intricate notches or markings with sharp corners and clean edges.
  2. Fine-Tipped Cutting Tools: The cutting machine is equipped with fine-tipped cutting tools, such as laser beams or precision blades, capable of achieving intricate cuts with small notches and markings.
  3. Customizable Cutting Parameters: The machine’s software allows users to customize cutting parameters, such as cutting speed, power, and depth, cnc leather cutting machine to achieve optimal results for cutting intricate notches or markings.
  4. Pattern Recognition: The machine may feature pattern recognition technology that identifies key points or markers in the cutting pattern to ensure accurate placement of intricate notches or markings.
  5. Automatic Material Alignment: The machine’s automatic material alignment system ensures that the fabric or material is positioned correctly before cutting, minimizing the risk of misalignment or errors in intricate notches or markings.
  6. Multi-Layer Cutting Capability: If the cutting pattern involves multiple layers of material, the machine is capable of cutting through these layers simultaneously with precision, ensuring that intricate notches or markings are consistent across all layers.
  7. Real-Time Monitoring and Adjustment: The machine continuously monitors the cutting process in real-time, making automatic adjustments as needed to maintain accuracy and consistency throughout the cutting of intricate notches or markings.
  8. User-Friendly Interface: The machine’s user interface provides intuitive controls for designing, importing, and editing cutting patterns with intricate notches or markings, allowing users to easily create and customize their designs.
  9. Quality Assurance: After cutting, the machine may include quality assurance features, such as vision systems or manual inspections, to verify the accuracy and integrity of intricate notches or markings before they are assembled into the final product.

By incorporating these features and capabilities, a cutting machine can effectively handle cutting patterns with intricate notches or markings, ensuring precise and accurate results for various applications in industries such as textile, apparel, automotive, and aerospace.

How does the machine handle cutting patterns with complex interlocking pieces?

Handling cutting patterns with complex interlocking pieces requires precision and accuracy from the cutting machine. Here’s how such a machine might handle this task:

  1. Advanced Cutting Technology: The machine utilizes advanced cutting technology, such as laser or waterjet cutting, which allows for intricate and precise cuts even in complex patterns with interlocking pieces.
  2. High-Precision Cutting Tools: The cutting machine is equipped with high-precision cutting tools, such as rotary blades or oscillating knives, capable of achieving intricate cuts with sharp corners and clean edges.
  3. Customizable Cutting Parameters: The machine’s software allows users to customize cutting parameters, such as cutting speed, blade pressure, and cutting depth, to achieve optimal results for complex interlocking patterns.
  4. Pattern Recognition: The machine may feature pattern recognition technology that identifies key points or markers in the cutting pattern to ensure accurate alignment and interlocking of pieces.
  5. Automatic Material Alignment: The machine’s automatic material alignment system ensures that the fabric or material is positioned correctly before cutting, minimizing the risk of misalignment or errors in interlocking pieces.
  6. Multi-Layer Cutting Capability: If the cutting pattern involves multiple layers of material, the machine is capable of cutting through these layers simultaneously with precision, ensuring that interlocking pieces align perfectly.
  7. Real-Time Monitoring and Adjustment: The machine continuously monitors the cutting process in real-time, making automatic adjustments as needed to maintain accuracy and consistency throughout the cutting of complex interlocking patterns.
  8. Testing and Prototyping: Before cutting the final product, the machine may offer the option to create test or prototype cuts to verify the accuracy of interlocking pieces and make any necessary adjustments before full-scale production.
  9. User-Friendly Interface: The machine’s user interface provides intuitive controls for designing, importing, and editing complex cutting patterns with interlocking pieces, automatic feeding textile canvas denim t-shirt cutting machine allowing users to easily create and customize their designs.
  10. Quality Assurance: After cutting, the machine may include quality assurance features, such as vision systems or manual inspections, to verify the accuracy and integrity of interlocking pieces before they are assembled into the final product.

By incorporating these features and capabilities, a cutting machine can effectively handle cutting patterns with complex interlocking pieces, ensuring precise and accurate results for various applications in industries such as textile, apparel, automotive, and aerospace.

How can the results of vlf tester be recorded and analyzed?


The results of VLF (Very Low Frequency) tester tests can be recorded and analyzed using various methods and tools to facilitate interpretation and decision-making.

Here’s how you can record and analyze VLF tester results:

  1. Data Logging: Many modern VLF testers come equipped with data logging capabilities that allow you to record test parameters, measurements, and test duration automatically. The recorded data can be saved internally on the tester or exported to external storage devices for further analysis.
  2. Test Reports: Generate test reports directly from the VLF tester or associated software, summarizing key test parameters, test results, and any abnormalities observed during testing. These reports can be stored electronically or in hard copy format for future reference and analysis.
  3. Software Analysis Tools: Utilize specialized software tools designed for analyzing VLF test data. These software programs often offer advanced data visualization, trend analysis, statistical analysis, and reporting features to help identify patterns, trends, and anomalies in test results.
  4. Graphical Representation: Plot test data on graphs or charts to visualize trends and patterns over time. Graphical representation can help identify abnormalities or deviations from expected behavior, such as voltage breakdown events, waveform distortions, or voltage trends during ramp-up and hold phases.
  5. Comparative Analysis: Compare test results from multiple VLF tests conducted at different times or on different equipment. Identifying changes or trends in test results over time can provide insights into the condition of the insulation system and help assess the effectiveness of maintenance interventions.
  6. Threshold Monitoring: Establish threshold limits or criteria for acceptable test results based on industry standards, manufacturer recommendations, vlf tester or historical data. Monitor test results against these thresholds to identify deviations or exceedances that may indicate potential issues with the insulation system.
  7. Integration with Asset Management Systems: Integrate VLF test data with asset management systems or condition monitoring platforms for centralized data storage, analysis, and reporting. This allows for seamless integration of VLF test results with other diagnostic tests and operational data for comprehensive asset management and decision support.
  8. Expert Interpretation: Consult with experts or specialists in insulation testing and diagnostics to interpret VLF test results accurately. Experienced professionals can provide valuable insights, recommendations, and interpretations based on their expertise and knowledge of industry best practices.

By recording and analyzing VLF tester results using these methods and tools, you can gain valuable insights into the condition of insulation systems, identify potential issues or anomalies, and make informed decisions regarding maintenance, repair, or replacement strategies to ensure the reliability and safety of electrical assets.

What are the environmental implications of using an transformer turns ratio test kit?

The environmental implications of using a transformer turns ratio (TTR) test kit are generally minimal, but there are a few considerations to keep in mind:

  1. Energy Consumption: TTR test kits typically require electrical power to operate, whether from batteries or mains power. While the energy consumption of individual tests is relatively low, the cumulative energy usage from frequent testing can contribute to overall energy consumption. Using energy-efficient testing equipment and optimizing testing frequency can help minimize this impact.
  2. Waste Generation: TTR test kits may produce waste in the form of packaging materials, disposable batteries, or obsolete equipment. Proper disposal and recycling of these materials are essential to minimize environmental impact. Choosing test kits with minimal packaging and reusable components can help reduce waste generation.
  3. Chemical Exposure: Some components of TTR test kits, such as batteries or electronic components, may contain hazardous substances that pose environmental risks if not handled or disposed of properly. It’s important to follow manufacturer guidelines for safe handling, storage, and disposal of these materials to prevent environmental contamination.
  4. Carbon Emissions: If TTR test kits are manufactured and transported over long distances, they may contribute to carbon emissions associated with manufacturing, transportation, and distribution processes. transformer turns ratio test kit Choosing locally manufactured or regionally sourced products can help reduce carbon emissions associated with supply chain logistics.
  5. Resource Consumption: The production and disposal of TTR test kits require the consumption of natural resources, including raw materials, energy, and water. Minimizing resource consumption through efficient manufacturing processes, product design optimization, and recycling initiatives can help mitigate environmental impacts.
  6. Lifecycle Assessment: Conducting a lifecycle assessment (LCA) of TTR test kits can provide insights into their environmental footprint across various stages, including raw material extraction, manufacturing, distribution, use, and end-of-life disposal. Identifying opportunities for improvement and implementing eco-friendly practices can help reduce overall environmental impact.

Overall, while the environmental implications of using a TTR test kit are relatively low compared to other activities, such as transformer manufacturing or operation, it’s essential to adopt sustainable practices and minimize environmental risks throughout the lifecycle of the equipment. By considering energy efficiency, waste reduction, chemical safety, carbon emissions, resource consumption, and lifecycle assessment, stakeholders can make informed decisions to mitigate environmental impacts and promote sustainable testing practices.

How do pressure reducing DIN3202F4 gate valve maintain constant downstream pressure in pneumatic circuits?

Pressure reducing DIN3202F4 gate valves are used in pneumatic circuits to maintain a constant downstream pressure by automatically adjusting the flow of compressed air entering the system.

Here’s how they work:

  1. Valve Design: DIN3202F4 gate valves are designed with a gate mechanism that can be adjusted to control the flow of air passing through the valve. The gate can be raised or lowered within the valve body to regulate the size of the flow opening, thereby adjusting the rate at which air passes through the valve.
  2. Pressure Reducing Mechanism: The valve is equipped with a pressure reducing mechanism, typically a diaphragm or piston actuator, which senses the downstream pressure and modulates the position of the gate accordingly. As the downstream pressure fluctuates, the actuator responds by adjusting the gate position to maintain the desired setpoint pressure.
  3. Setpoint Adjustment: The desired downstream pressure is set using an external adjustment mechanism, such as a set screw or knob located on the actuator. This allows operators to adjust the pressure reducing valve to maintain the desired pressure level within the pneumatic circuit.
  4. Feedback Control: Some pressure reducing valves may incorporate feedback control mechanisms, such as pneumatic or electronic sensors, to continuously monitor the downstream pressure and provide feedback to the actuator. This enables the valve to make real-time adjustments to the gate position in response to changes in downstream pressure, ensuring accurate pressure regulation.
  5. Flow Regulation: By adjusting the position of the gate within the valve body, the pressure reducing valve regulates the flow of compressed air entering the pneumatic circuit. As the gate is raised or lowered, the flow area through the valve changes, DIN3202F4 gate valve allowing more or less air to pass through and thereby controlling the downstream pressure.
  6. Fail-Safe Operation: Pressure reducing valves may incorporate fail-safe features to ensure safe operation in the event of power loss or system failure. For example, some valves may include spring-loaded mechanisms that automatically close the valve when pressure drops below a certain threshold, preventing overpressurization of downstream equipment.
  7. Reliability and Accuracy: Pressure reducing valves are designed for reliable and accurate pressure control, providing consistent downstream pressure regulation over a wide range of flow rates and operating conditions. They are typically manufactured to high precision standards to ensure reliable performance and long-term durability in pneumatic applications.

Overall, pressure reducing DIN3202F4 gate valves maintain constant downstream pressure in pneumatic circuits by adjusting the flow of compressed air entering the system in response to changes in downstream pressure. Through precise control and regulation of airflow, these valves ensure consistent and reliable operation of pneumatic equipment and processes.

What factors should be considered when determining the optimal location for installing electric pneumatic butterfly valves within pneumatic circuits?

Determining the optimal location for installing electric pneumatic butterfly valves within pneumatic circuits requires careful consideration of several key factors to ensure efficient operation and optimal performance.

Here are the factors to consider:

  1. System Requirements: Understand the specific requirements of the pneumatic system, including the desired flow rates, pressure levels, and operating conditions. The location of the valves should support these requirements and facilitate the desired functionality of the system.
  2. Flow Direction: Consider the direction of airflow within the pneumatic circuit. Valves should be positioned to control the flow of air in the desired direction, ensuring that they facilitate the intended movement of pneumatic actuators, components, or processes.
  3. Accessibility: Ensure that the valves are easily accessible for installation, operation, and maintenance. Locate the valves in areas where they can be readily reached for adjustment, inspection, or servicing without requiring extensive disassembly or downtime.
  4. Space Constraints: Take into account any space constraints or limitations within the pneumatic system or equipment. Position the valves in locations that minimize interference with other components, piping, or machinery and optimize the efficient use of available space.
  5. Piping Layout: Consider the layout of the pneumatic piping network and the placement of other components within the system, such as actuators, sensors, filters, regulators, and control valves. Locate the electric pneumatic butterfly valves in positions that facilitate efficient integration with the existing piping layout and support optimal system performance.
  6. Operating Environment: Evaluate the environmental conditions surrounding the pneumatic circuit, including temperature, humidity, exposure to contaminants, and potential hazards. Install the valves in locations that minimize exposure to adverse environmental factors and ensure reliable operation under varying conditions.
  7. Pressure Drop: Minimize pressure drop across the pneumatic circuit by positioning the valves in locations that facilitate smooth airflow and minimize turbulence. Avoid installing valves in areas with sharp bends, restrictions, or obstructions that could increase pressure losses and reduce system efficiency.
  8. Control Strategy: Consider the control strategy and sequence of operations within the pneumatic system. Position the electric pneumatic butterfly valves in locations that support the desired control logic, sequence, or timing of valve actuation to achieve the intended system behavior and performance.
  9. Safety Considerations: Ensure that the installation of the valves complies with relevant safety standards and guidelines. electric pneumatic butterfly valves Locate the valves in areas that minimize safety risks, such as exposure to high temperatures, electrical hazards, or mechanical hazards, and implement appropriate safeguards to protect personnel and equipment.
  10. Feedback and Monitoring: If applicable, consider the need for feedback signals or monitoring of valve position, status, or performance. Install the valves in positions that facilitate the integration of sensors, switches, or monitoring devices to provide real-time feedback and enable effective control and supervision of the pneumatic system.

By carefully considering these factors and evaluating the specific requirements of the pneumatic system, operators can determine the optimal location for installing electric pneumatic butterfly valves within pneumatic circuits, ensuring efficient operation, reliable performance, and safe and effective control of pneumatic processes.